A customer recently asked us a question we get often, so let’s answer it for everyone, in detail. Their mobile beacon’s track jumps when it crosses from one submap to the next, and aligning the submaps is hard. Below we follow the official Building submaps guide — what a submap is, service zones, the handover zone, where to place the beacons, and how to align two submaps — and turn it into concrete steps. Everything here is for a 2D setup; 3D comes afterwards, the same way. (Tip: click any picture to open it full size.)

"I set up two submaps. When the mobile beacon crosses from Submap 0 to Submap 1 the track becomes untidy and jumps. Aligning the two submaps is hard."
The track doesn’t jump because the system is broken. It jumps because the map was built all at once, and the handover was set up before each submap tracked on its own. Build it in the right order and the case is straightforward.
1) Place the stationary beacons (2D). 2) Build Submap 0, freeze it, get clean tracking. 3) Build Submap 1, freeze it, get clean tracking — on its own. 4) Draw a service zone for each submap. 5) Set up the handover zone where the service zones overlap. 6) Align the two submaps.
1. Why submaps are needed
A single set of beacons cannot cover everything, for three reasons:
- Range of the beacons. A mobile beacon must hear the stationary beacons within about 30 m. Beyond that, you need another submap.
- Non-line-of-sight — walls. Ultrasound does not pass through walls. A separate room needs its own beacons, i.e. its own submap.
- Non-line-of-sight — moving obstructions. Racks, machines or the vehicle itself block beacons; extra submaps keep enough beacons in view.

2. The map and the submap
A map is made of submaps, stationary beacons and service zones, served by one modem. A submap holds 1–4 stationary beacons. The symbols are the ones in Fig. 1.
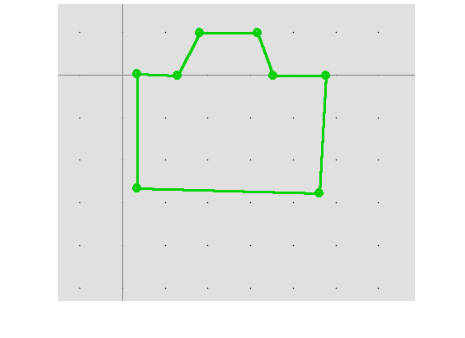
3. Service zones
A service zone is the area a submap is allowed to track. Draw one per submap, only after that submap already tracks well:
- Choose the submap first — click its tab (e.g. "Submap 0"). You can’t draw a zone in the modem / whole-map view.
- SHIFT + left-click to drop each point (a green polygon). SHIFT + left-click a point to delete it; right-click → "Clear all points" to remove the zone.
- Trim each zone from the full 30 m to the area where tracking is really needed.
Why it matters: a beacon outside any service zone isn’t tracked. Without zones (or at the full 30 m) submaps overlap too much, the system gets "too many opinions" on where the beacon is, and the track jumps. A smaller zone also raises the update rate.
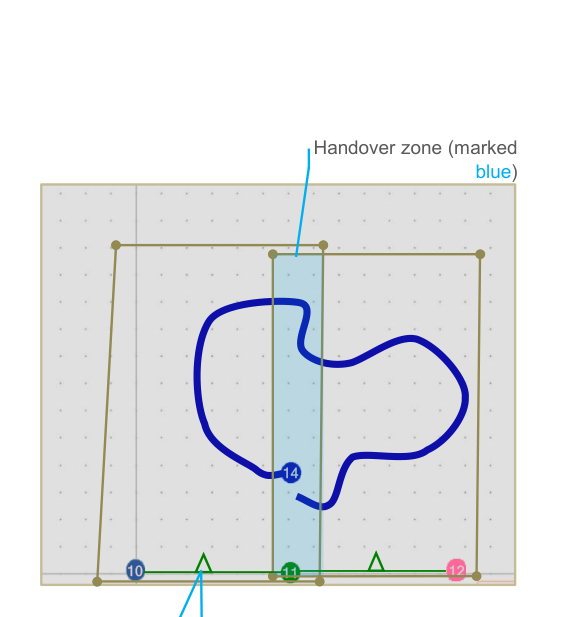
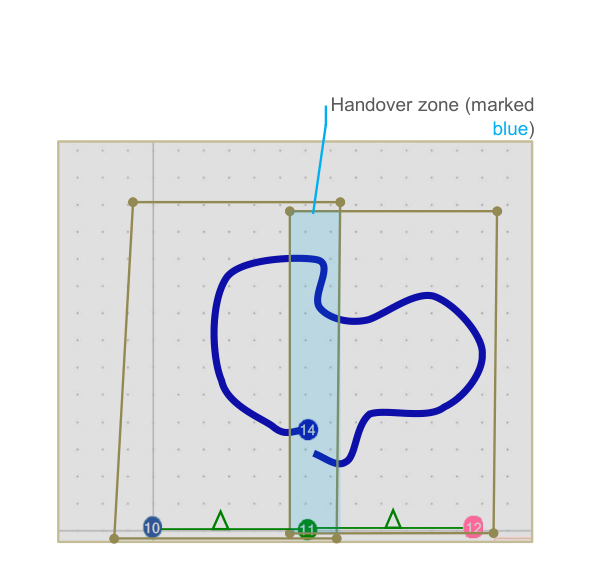
4. The handover zone
Where two service zones overlap is the handover zone — the thin band (marked blue) in which the track is passed from one submap to the next.
- Marvelmind recommends partially overlapping submaps (Operating Manual §9.11) — this gives a smooth handover.
- The handover zone must fit at least 4 location updates, or the handover is inaccurate (§9.14).
- There are several handover types — see Handover types. Types I/II hand over at the zone edge; Type III blends the two submaps and is often best, but not always — and no type fixes submaps that don’t each track well first.
5. How to place the beacons
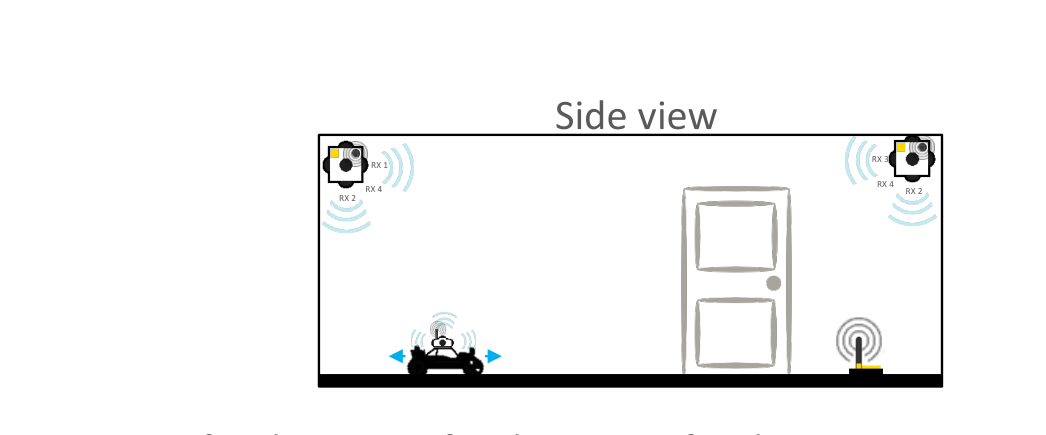
Placement is what makes or breaks tracking. The rules, in order of importance:
- Line of sight, line of sight, line of sight. At every point the mobile beacon must hear, within 30 m, at least 2 stationary beacons (2D).
- Sensible spacing. Keep the beacons a moderate distance apart — roughly 5–10 m (a ~5×5 to 10×10 m submap). Don’t stretch to the 30 m limit (weak, slow), and don’t cram them at ~1 m (wasteful). Smaller submaps also give a higher update rate.
- Fewest beacons for the largest area, and the fewest chances of obstruction.
- Mount high on walls/ceiling, spread out (never in one straight line); lowest angle 20–30°; typical height ~3–5 m (too high loses accuracy). See How to choose beacon height.
6. Aligning the two submaps
Only after both submaps track on their own do you join them. There are two cases:
Case A — the submaps share a beacon (simplest): Submap 0 = beacons 2 + 3, Submap 1 = beacons 3 + 4 — beacon 3 belongs to both. The submaps are tied together through the shared beacon, and the service zones overlap around it.
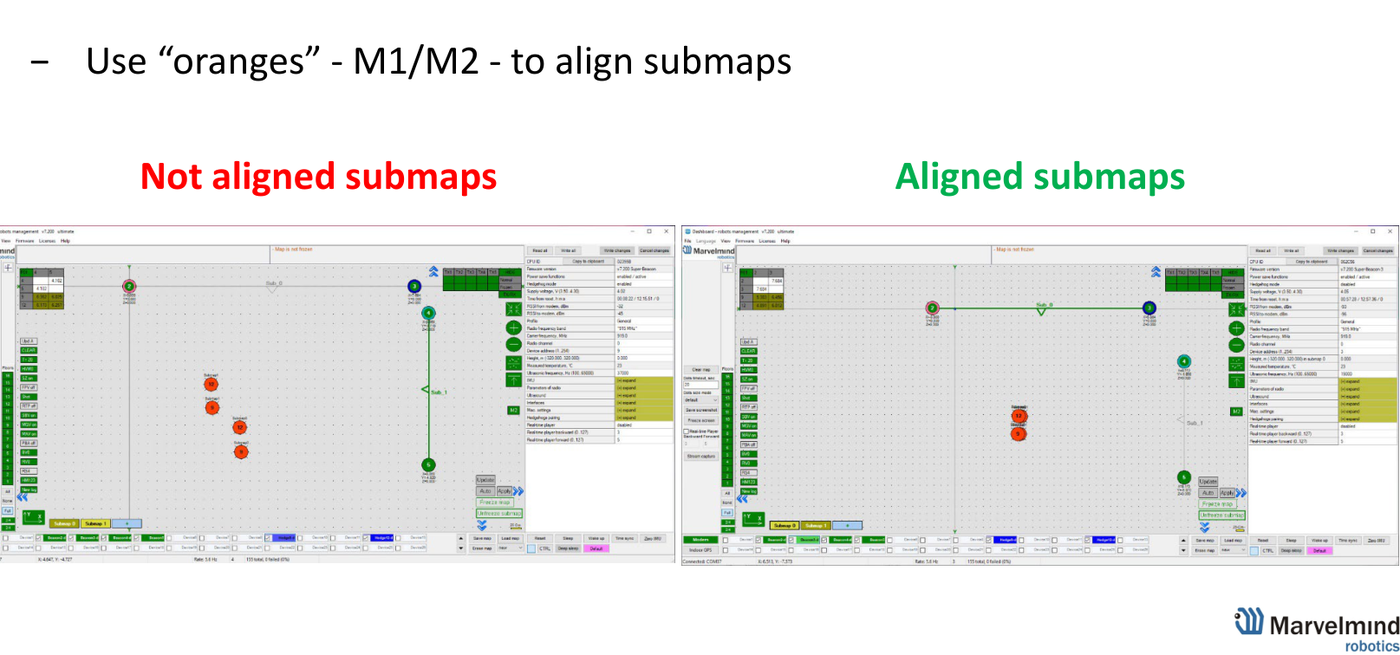
Case B — no shared beacon (the typical case, like the question above): Submap 0 = beacons 2 + 3, Submap 1 = beacons 4 + 5 — no common beacon. You align them by hand using the "oranges":
- Stand the mobile beacon in the overlap, where both submaps can track it. The Dashboard then shows that one hedge twice — once as solved by Submap 0 and once by Submap 1 (the M1 / M2 markers, the "oranges").
- Select a submap and drag it: hold CTRL + drag / scroll to move and rotate it until the two markers of that same hedge fully overlap — the view goes from "Not aligned" to "Aligned" (Fig. 8).
- Move the hedge to one or two more points and repeat for a better fit.
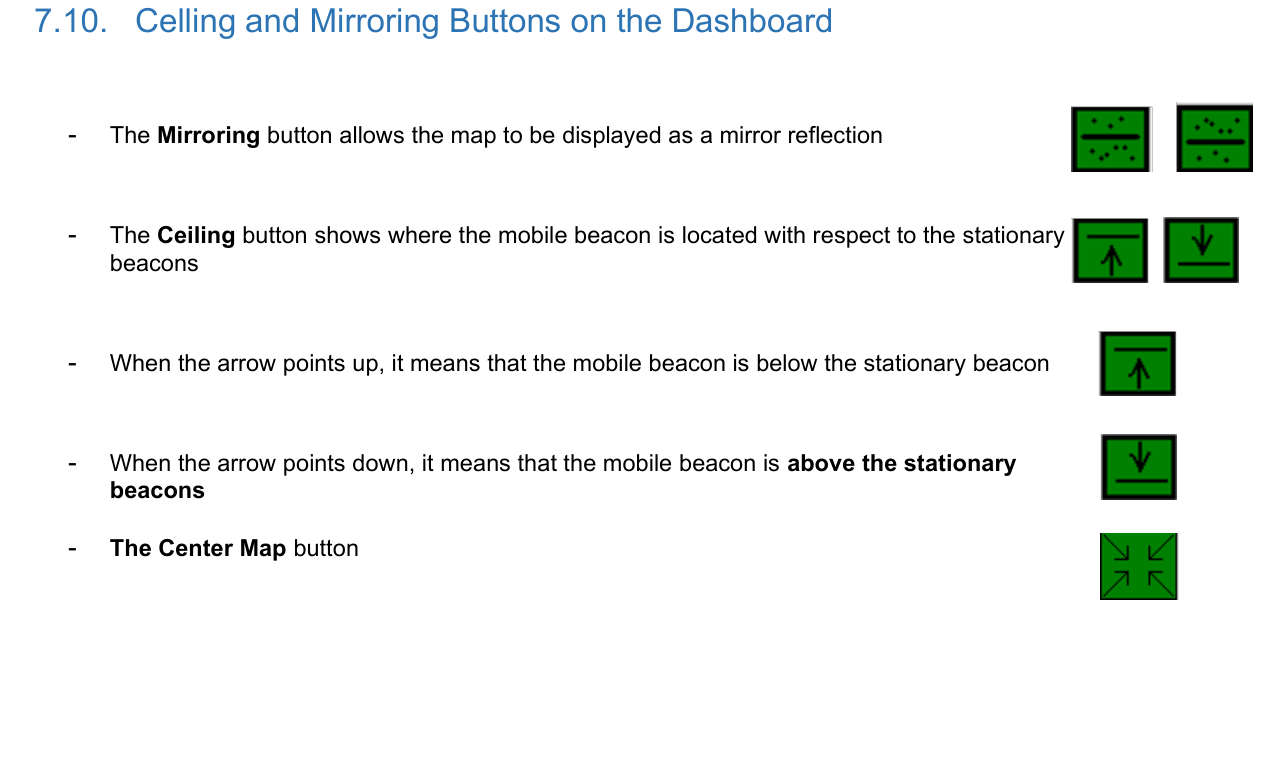
Before you drag, check the orientation — if a submap is flipped, the markers will never line up. Two buttons control this (Operating Manual §7.10):
- Mirroring — flips the map left ↔ right.
- Ceiling — sets up ↔ down: arrow up = the mobile beacon is below the stationary beacons; arrow down = above them. Get this right per submap.
Also check the "orange" warnings (a different use of orange): an orange beacon means its settings differ from the others — fix them; clear any orange diagnostic message (minor issue); and keep the tracking blue, not orange (orange = lower confidence).
If the track still jumps — checklist
- Does each submap track cleanly on its own, in 2D, first?
- At every point, does the hedge hear ≥2 beacons within 30 m? Beacons at a sensible spacing (~5–10 m, not 30 m apart, not ~1 m), spread out, not in one line?
- Are the stationary beacon heights entered (always — submaps or not)?
- Orientation right — not mirrored (left/right) and Ceiling correct (up/down)?
- Did you drag with the "oranges" (M1·M2) until the same hedge’s two markers fully overlap?
- Service zones drawn per submap, overlapping only in a thin band (the handover zone)?
- Any orange beacon / message / tracking? Resolve it.
Sources: Building submaps (PDF) · Step-by-step · Handover types · How to choose beacon height · Placement Manual · Operating Manual.